How to Make Nacho Chips From Tortillas: Quick & Easy Method
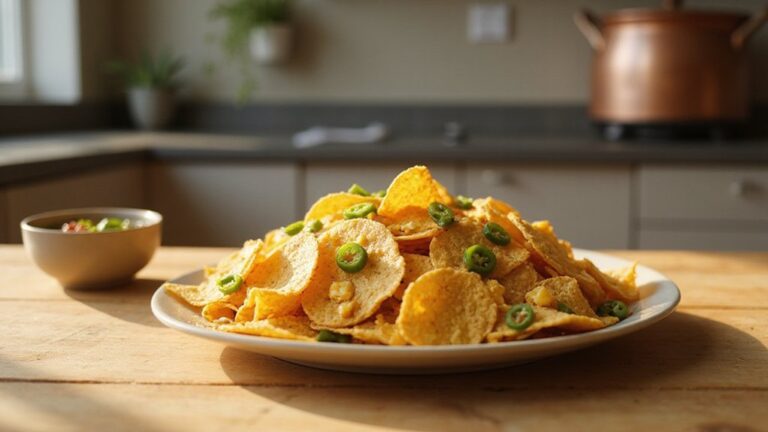
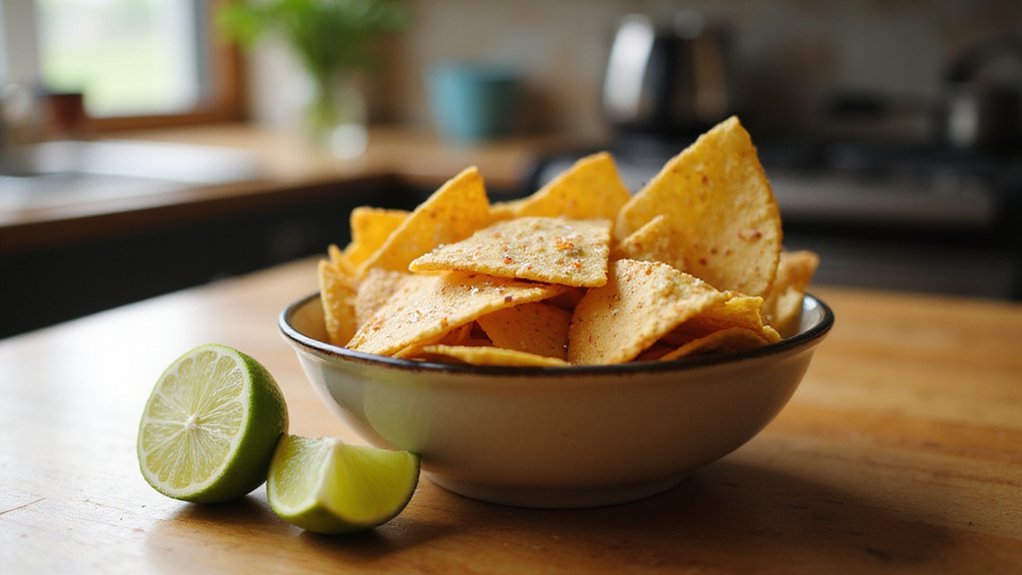
If you’re wondering how to make crispy, flavorful nacho chips at home instead of relying on store-bought bags, you’re in the right place.
Using simple ingredients like corn tortillas, you can quickly turn them into fresh, sturdy chips perfect for heavy toppings.
Once you know the basic method, you can experiment with seasonings and storage to customize your snack.
Best Tortillas for Homemade Nacho Chips
Corn tortillas are the best choice for homemade nacho chips because they provide a reliable crunch and sturdy structure that flour tortillas cannot match. Flour tortillas tend to turn soft or brown too quickly before they can crisp properly, resulting in flimsy chips that don’t hold up well under toppings. Corn tortillas, on the other hand, are better at maintaining their shape and flavor during frying or baking, ensuring each chip stays crisp and flavorful. Pay attention to tortilla thickness. Medium-thick corn tortillas, roughly 1/16 to 1/8 inch thick, produce sturdier chips that can support heavier toppings like cheese, beans, or salsa without breaking. Thin tortillas, while crisping faster, tend to become brittle and break easily. For even cooking, aim for tortillas with a consistent thickness throughout, which helps ensure each chip cooks evenly and develops a uniform crunch. For the most authentic restaurant-style crunch, choose tortillas that are not too fresh—drier, slightly aged tortillas crisp better without absorbing excess oil during frying. For consistent results, follow the top popcorn picks from your popcorn maker review to ensure even heating when toasting tortillas. Proper calibration of your machine’s heat settings is essential to avoid burning the tortillas before they fully crisp. Using a machine with consistent temperature control helps maintain the ideal frying environment for perfectly crisp chips.
How to Cut Tortillas for Perfect Nacho Chips
To cut tortillas into the ideal triangle shape for nacho chips, start by stacking several tortillas to speed up the process. Use a pizza cutter or a sharp knife for straight, single-pass cuts, ensuring uniformity. For a standard 6-inch tortilla, aim to cut into six triangles for hearty dipping chips; if you prefer smaller, crunchier pieces, cut into eight. To achieve consistent sizes, halve the stack if making six pieces, then cut each half into thirds. For eight pieces, quarter the stack, then cut each quarter in half. Adjust your pressure based on the tortilla’s thickness to prevent tearing, and always use a stable cutting surface with your fingers clear of the blade for safety. Only cut what you’ll cook soon to keep the tortillas from drying out. For best texture, aim for consistent measurements like a slushie machine requires for its sugar-to-water ratio to avoid crystallization.
Baked Method: Easy Oven Chips in Under 20 Minutes
Preheat your oven to 375°F–400°F to quickly drive off moisture and ensure crispness. Thinner tortillas will brown and crisp faster at this temperature. Use dark baking sheets if you want a more evenly browned chip, but check early to prevent burning as they tend to brown faster. For a more uniform color and texture, consider using a waffle cone maker to apply consistent, direct heat.
Lightly oil both sides of your tortilla wedges to promote crispness and add flavor. Season with salt to taste. For a more authentic movie theater taste, you can also sprinkle on a fine popcorn salt for even coverage. Arrange the wedges in a single layer on parchment-lined sheets, making sure they aren’t overlapping. This allows hot air to circulate and helps them bake evenly.
Bake for 8 to 15 minutes, flipping the wedges halfway through. Rotate the baking sheets during baking to avoid hot spots that can lead to uneven cooking. Keep an eye on them starting around the 8-minute mark. When they turn golden and feel firm when touched, they are done. Don’t worry if they seem slightly soft at first—they will crisp as they cool. Once out of the oven, let them cool briefly before serving, ensuring maximum crunch. Just as with popcorn kernel types, the variety of tortilla you choose affects the final texture and flavor of your chips.
Air Fryer Nacho Chips: Fast, Crispy, and Oil-Free
Preheating your air fryer to 350°F for 3 to 5 minutes is essential for crispy nacho chips. This ensures even cooking and better browning. Use fresh corn or flour tortillas, sliced into uniform wedges to promote consistent crispness and prevent uneven cooking. Arrange the wedges in a single layer without overlapping, as blocking airflow can result in soggy spots. Cook the chips for 4 to 6 minutes, flipping them halfway through to ensure even browning. Keep a close eye near the end of the cooking time because edges brown quickly. For oil-free chips, skip the spray and cook directly; they will crisp further as they cool. Remove the chips just before they reach your preferred level of doneness to prevent overbaking. Season immediately after cooking with salt to enhance flavor. Unlike soft pretzels, which contain high salt levels that are unsafe for dogs, these chips can be a safer treat alternative when shared in moderation. For those who enjoy sweet treats, top cake and ice cream cone reviews provide guidance on quality and value for dessert lovers. Choosing a fryer basket with proper ventilation is key when preparing multiple batches of chips.
Fried Tortilla Chips for Restaurant-Style Crunch
To achieve restaurant-style crunch, heat neutral oil to 350°F in a wide pan about 1/4 to 1/2 inch deep. Use a thermometer to maintain that precise temperature, as adding tortilla wedges briefly drops it. Fry in small batches, flipping once, for 2 to 3 minutes until lightly golden with small blisters. This frying technique ensures even cooking and prevents greasy, uneven chips. Remove the chips with a slotted spoon and drain them on paper towels while still hot. Salt immediately to enhance flavor. Think of the salt’s role here, much like rock salt for ice cream makers controls freezing, the right seasoning here controls the final crunch. Thin corn tortillas cut into six wedges fry evenly, but avoid over-browning, as it ruins their light crunch. Pull them early for a perfect crispy texture. Maintaining consistent heat and rapid draining creates that airy, crunchy consistency typical of restaurant chips—no smoke, just crisp perfection. For storing leftover chips, a dedicated freezer maintains their ideal texture. A warmer tray for food can keep these chips crisp and warm for longer service.
5 Essential Seasonings for Nacho Chips (And When to Use Them)
Chili powder forms the foundation of the seasoning blend, providing a bold, savory-red pepper flavor that coats the chips with a satisfying kick. Cumin, used sparingly, adds earthy depth without overpowering the tortilla’s natural flavor. Paprika imparts a mild pepper taste along with vibrant color; opt for smoked paprika if you want a richer, bolder smoky note. Garlic powder provides savory umami without moisture, making it ideal for pre-baking tosses. Salt enhances all the flavors, sharpening the overall taste, while cayenne or red pepper flakes boost the heat—perfect for chips that will be served with milder toppings. For consistent results, the seasonings can be blended in a snow cone machine to ensure an even, fine-grain mix. For a balanced seasoning, start with a heavier hand on the chili powder and then adjust the amounts of cumin and garlic powder to taste, ensuring the flavors complement without clashing. To achieve an evenly distributed coating, consider using an air popper to apply seasonings in a light, dry mist. Selecting the right serving vessel, such as a durable ice cream cup, can prevent soggy chips by keeping them separated from any cold dips.
Store Tortilla Chips Without Losing Crunch
Using airtight storage containers is crucial for keeping your tortilla chips crisp. Rigid options like glass or ceramic work best because they block humidity more effectively than flimsy plastic bags. Transfer chips into these containers immediately after opening the bag instead of leaving them in their original packaging. To further prevent moisture, add a silica gel packet inside the container, which absorbs excess humidity. For those who prefer freshly-made snacks, consider using a top popcorn machine to create perfectly crunchy tortilla chips from scratch. Store the container in a cool, dry pantry away from sinks, stoves, or any heat sources that can cause condensation. Of course, using a machine with a built-in compressor can ensure your ice cream base is perfectly chilled before you even start. Interestingly, the same principle of airtight storage that protects chips from moisture also applies to avoiding freezer burn in premium frozen desserts. Avoid refrigerating the chips because the moisture from the cold environment often leads to sogginess. Portion out smaller quantities into separate containers to minimize repetitive opening of the main supply, which exposes the chips to humid air. When resealing, press out as much air as possible to help maintain crispness. Following these steps allows you to enjoy crunchy tortilla chips for days on end.
Salsa, Guac, and More Pairing Ideas for Nacho Chips
To turn nacho chips into a complete snack experience, focus on flavor pairings that complement their texture. Start by selecting dips and toppings that match the crunch and saltiness of your chips. Fresh pico de gallo offers a bright, tangy tomato flavor that enhances the crunch, while roasted salsa introduces a sweeter, smoky note. Guacamole’s creamy texture balances the saltiness and crispness, and adding lime juice keeps it lively. For a truly convenient setup, consider using top popcorn machines with carts to serve your chips and dips at parties.
Layering ingredients adds complexity. Diced avocado, sliced jalapeños, and chopped cilantro on top create a fresh, vibrant combination. Dips like sour cream or chipotle crema introduce tang and heat, elevating the overall flavor. For starters, a classic mix of salsa, guacamole, and sour cream provides a balanced, satisfying bite that prevents your chips from getting soggy too quickly. For a Texas-inspired vibe, pair queso with pico de gallo, or ramp up the spice with hot salsa and pickled peppers. These pairings transform simple nacho chips into a full-flavored, crave-worthy spread.
Why Homemade Nacho Chips Beat Store-Bought Every Time
Making nacho chips from tortillas at home results in a fresher flavor and better texture compared to store-bought options. You have control over every ingredient, allowing you to skip preservatives and excess sodium that often come with packaged chips. Homemade chips tend to be crunchier and sturdier, making them more capable of handling heavy dips without breaking apart. They also cost less—about half the price per serving—and reduce waste by using leftover tortillas.
You can customize thickness and shapes based on your needs, whether for scooping salsa or piling high with cheese. Baking or frying gives you options to adjust richness and crispness, so your chips match your preference. Plus, with endless seasoning options like spicy, smoky, or light flavors, you can create unique blends that store-bought brands can’t match. Making only what you need ensures you serve chips at their peak crunch. That’s why homemade nacho chips are the smarter choice every time.