DIY Ice Cream Machine: How to Build Your Own Cheaply
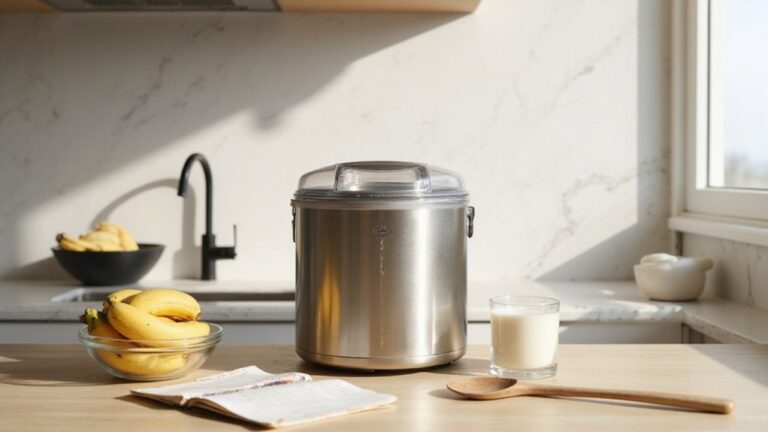
Ever wondered how to make your own ice cream without breaking the bank? You can create a working DIY ice cream maker for under $20 using just a small DC motor, a food-safe container, and a homemade paddle.
This way, you have full control over your ingredients and can enjoy fresh, personalized ice cream whenever you like.
Keep reading to see how you can do it easily and cheaply.
Why Build Your Own Ice Cream Machine Instead of Buying One?
Building your own ice cream machine can be a cost-effective alternative to purchasing one, especially since store-bought models can range from $40 to over $700. By repurposing materials and hardware you already have, you significantly reduce expenses while maintaining control over the entire process. This DIY approach enables you to customize ingredients, allowing for creative flavor combinations like dairy-free bases, natural extracts, or fresh mix-ins tailored to your dietary preferences. Additionally, reusing containers and parts helps lower your environmental footprint compared to buying new appliances. For consistent results, you can follow the exact measurements and step-by-step instructions from how to make perfect slushies with your machine. Hand-on experience with controlled freezing and consistent churning not only teaches valuable technical skills but also makes the process more engaging for hobbyists and families alike. Ultimately, building your own ice cream machine transforms a simple dessert into a practical project that combines learning, sustainability, and personalized enjoyment. For reference, commercial-grade carts like those in top popcorn machines offer insights into sturdy, wheeled frames that could inspire your own DIY ice cream cart build. Similarly, studying the popcorn kernel varieties reviewed in those machines can guide you in selecting the best ingredients for consistent texture in your homemade ice cream.
Parts You’ll Need for a Motorized Ice Cream Machine Under $20
To build a budget-friendly motorized ice cream machine under $20, start by sourcing a compact DC or AC motor—aim for one in the $9 to $16 range. Make sure the motor matches your container size and spins at a slow speed to avoid splashing or uneven mixing. You can find refurbished motors within this price range, but they might come at a slightly higher cost or with less certainty of function. For top value, consider motors tested against quality and performance benchmarks similar to the best ice cream freezers. You can also look for motors that offer consistent flavor integration as seen in top-rated popcorn machines, ensuring even mixing throughout the process. A motor that prioritizes a neutral flavor profile will prevent unwanted tastes from affecting your ice cream.
Use a simple drive coupling such as salvaged gears or a rigid connector to link the motor shaft to your churn spindle. It’s important that this connection is firm yet allows smooth rotation. Your churn container should be food-safe, sealed, and able to withstand cold temperatures—common options include jars or plastic tubs. The mixing paddle, whether made of wire or plastic, needs to fit snugly inside without binding or wobbling, ensuring effective mixing.
Powering your machine involves a battery pack or a simple switch connected with basic wiring. Keep the wiring neat and secure with zip ties or screws to prevent movement during operation. Mount everything on a stable base to minimize vibration, and use fasteners and a straightforward bracket to keep all parts firmly in place. This approach will help you stay within the $20 budget while building a functional, homemade ice cream maker.
Step-by-Step: The Simplest Motorized Ice Cream Machine You Can Make
To build a basic motorized ice cream maker, start with the simplest design: a small DC motor that spins a paddle inside a freezer-safe container. Drill a snug, centered hole in the lid to guide the spindle and prevent wobbling. Mount your low-voltage DC motor securely on a rigid support above the lid to keep it stable during operation. Attach the paddle to the motor shaft using a coupler or clamp, ensuring it stays centered and clears the container walls. To achieve consistent texture without an ice cream machine, ensure your simple syrup is properly measured and chilled. Wire a switch inline with your power supply for easy control, and briefly test the empty mechanism to verify smooth spinning before adding your chilled base. Once ready, place the container in a mixture of ice and salt around the canister and churn the mixture for 20 to 30 minutes, creating a soft-serve texture. A common mistake with similar machines is forgetting to pre-chill the container to avoid uneven freezing. For ergonomic convenience and to keep electronics dry, position the motor outside the cold zone. Pre-chilling your ingredients thoroughly enhances flavor infusion, and securing all wiring prevents shorts in the damp environment. Many homemade popcorn recipes similarly recommend using a healthy oil to achieve the best texture and flavor. An advanced approach would replace manual checks with sensor feedback using motor-driven resistance and torque sensing to automatically determine when the ice cream is ready.
Build a Hand-Crank Ice Cream Machine Without a Motor
Build a hand-crank ice cream machine without a motor, you’ll need to put your own steady turning to work. Start by selecting a food-safe stainless steel bowl as the canister, which will hold your ice cream mix. Use a wooden spoon or dowel as the dasher; attach it securely to a gear mechanism, such as a repurposed bike gear, to enable reversed rotation. The outer bucket should be a plastic tub that can be filled with ice and rock salt, providing the necessary cooling environment. Before beginning, review key safety points such as ensuring all materials are food-grade and the assembly is stable to prevent spills or injury. Place the assembly on a sturdy surface and secure the gear and chain setup to keep the crank turning smoothly. Pre-chill your ice cream mixture to below 45°F, then pour it into the steel canister, filling it about two-thirds full to allow room for expansion. Surround the canister with layers of ice and rock salt, ensuring even contact to maximize cooling. Turn the crank steadily for 15 to 30 minutes, replenishing the ice as it melts to maintain an effective cold environment. For those with dietary restrictions, be aware that soft pretzels are not gluten free, as traditional recipes rely on wheat flour. Once the mixture reaches the desired soft-serve consistency, stop turning and let it rest for a few minutes before serving. This simple, manual method produces a delicious batch without electricity and is ideal for small quantities.
Use Peltier Coolers to Freeze Ice Cream (No Freezer Required)
Peltier coolers can freeze small batches of ice cream without a freezer if proper thermal management is implemented. These modules transfer heat from a cold side to a cold side to a cold side when supplied with direct current, but their efficiency depends heavily on how well heat is managed. Clamping a high-quality cold plate against the module using thermal paste ensures good thermal contact, facilitating effective heat transfer from the ice cream mixture. On the hot side, attaching an oversized heatsink or setting up a liquid cooling loop helps reject heat efficiently to keep the hot side close to ambient temperature. Without aggressive heat rejection, the temperature difference across the Peltier module increases, which diminishes its cooling power. To optimize performance, insulate your cold chamber thoroughly so heat does not seep in and elevate temperatures inside. For those considering similar projects, selecting best syrup bottles can improve dispensing of liquid ingredients. Cleaning the cold plate with a soft, non-abrasive cloth after each use prevents residue buildup and maintains thermal efficiency. Remember, Peltier systems are best suited for small quantities or pre-chilled mixes; they struggle with large volumes or rapid freezing. Even with proper thermal management, achieving uneven ice formation is common when the lower part of the mold freezes faster than the liquid above. Achieving consistent results requires careful attention to thermal management to maintain the heat rejection necessary for proper freezing.
Common Ice Cream Machine Mistakes and How to Avoid Them
To avoid common ice cream machine mistakes, start by filling the bowl only two-thirds full. Overfilling restricts circulation and prevents proper freezing. Always freeze your canister completely before use to prevent slush and uneven textures. Make sure all parts are thoroughly dry to prevent ice buildup, which can cause paddle jams and inconsistent mixing. When assembling, ensure the paddle is seated correctly and the lid is securely locked; improper assembly can disable safety features and lead to machine malfunction. Maintain proper airflow by keeping at least three inches of clearance around the machine to prevent hot spots that can impair performance. For storage, pre-chill all inserts and avoid rushing restart cycles to allow components to stabilize. Use fresh dairy and appropriate fat content in your ingredients, as weak or old ingredients won’t freeze well or yield good texture. Paying attention to these details will help your DIY ice cream maker perform reliably every time. For a similar consistency, ensure your batter is thin and smooth like the funnel cake recipe that recommends whisking until no lumps remain. Additionally, checking the paddle position before starting can prevent the machine from overheating. For safe cleanup after use, never pour used oil down the drain; instead, dispose of fryer oil by collecting it in a sealed container once cooled.
How to Get Smooth, Creamy Ice Cream From a Homemade Machine
Controlling ice crystal size, air incorporation, and fat structure is key to achieving smooth, creamy ice cream from a homemade machine. To get smaller ice crystals, completely pre-chill your base before churning, and consider adding a stabilizer like gelatin, which prevents large crystal formation. Avoid over-churning; aim for a lower overrun, which helps keep the ice cream dense and prevents it from becoming icy. Using emulsifiers such as egg yolk can support a better fat structure, resulting in a drier, smoother scoop. For best results, selecting a top funnel cake mix can provide a similar balance of quality and performance for your batter. Balancing flavor involves adjusting fat content with strong extracts or fruit purees to prevent the ice cream from becoming too watery. For best texture and taste, temper your hard-frozen ice cream by letting it sit at room temperature for about 5 minutes before serving. This step softens the ice cream just enough to deliver the ideal creamy consistency right from your homemade machine.