How to Use a Dash Popcorn Maker: Step-by-Step Instructions
Using a Dash popcorn maker is a quick way to enjoy fresh, fluffy popcorn at home. To get started, you’ll need to clean the removable parts and assemble the unit.
Once you add your kernels and oil, the popping process begins—just watch for when it slows down to know when it’s done. Keep reading for a full step-by-step guide to making perfect popcorn every time.
Prepare Your Dash Popcorn Maker Before First Use
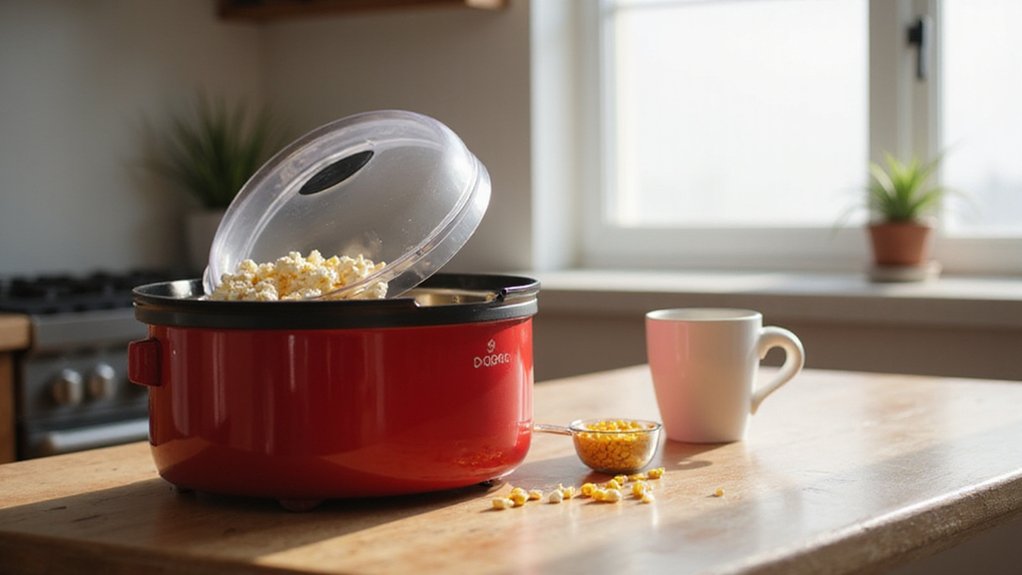
To prepare your Dash Popcorn Maker before first use, start by unboxing and inspecting all included parts—lid, measuring cup, and bowl—to ensure none are damaged or missing. Wash these removable parts with warm, soapy water and a non-abrasive sponge, then rinse thoroughly and dry completely. Wipe the main unit with a damp cloth, being careful not to submerge it or allow moisture near electrical components. Once everything is dry, place the popcorn maker on a flat, heat-resistant surface with plenty of clearance around it. Make sure the popping area is unobstructed to allow proper airflow. Keep your popcorn kernels in a cool, dry place to prevent spoilage. Do not use the popcorn maker until all parts are assembled, clean, and dry for safe operation. Measuring kernels using the built-in count-out lid, which offers 2-quart, 4-quart, and 1-quart options for precise portioning before you begin. For best results, always use premium popcorn kernels that are specifically recommended for stovetop or hot-air popcorn makers.
Assemble Your Dash Popcorn Maker in 3 Steps
To assemble your Dash popcorn maker, start by placing the base on a flat, heat-resistant surface with enough clearance for safe airflow. Ensure the base is level and dry to prevent wobbling during operation. Proper setup includes positioning the maker away from walls to maintain adequate clearance for ventilation. Next, attach the top cover firmly by snapping it onto the body until it’s secure, and check that it doesn’t wobble or come loose. For models with a stirring feature, install the stirring bar inside and lock it in place by turning the rotary knob clockwise. Finally, if your model uses a measuring cup, place it on top; otherwise, leave the vents open for proper ventilation. Double-check that all parts are seated correctly and that nothing is obstructing airflow before moving on. Once assembled, you can add flavoring later, but remember to store kernels properly using the recommended storage tips to keep them fresh. The heating vents double as a butter melting tray for convenient flavor enhancement during cooking. Confirm that ventilation isn’t blocked before operating the maker. Unlike popcorn, soft pretzels are unsafe for dogs due to their high salt content and potential for digestive upset. A common beginner mistake is to overfill the machine with kernels, which can lead to burning and poor popping.
Measure Kernels and Add Oil the Right Way
To measure kernels and oil accurately for your Dash popcorn maker, match the amounts to your machine’s size. For a 2-quart model, use 1/4 cup of kernels and 1 tablespoon of oil. A 4-quart machine needs 1/2 cup of kernels and 2 tablespoons of oil, while a 6-quart requires 3/4 cup of kernels and 3 tablespoons of oil. Overfilling beyond one cup of kernels can prevent proper popping, so stick to these guidelines for optimal results. The Dash machine’s detachable measuring lid eliminates the need for extra measuring cups by providing built-in kernel sections. For consistent results, use the same ratio of oil to kernels as you would for a slushie machine’s precise ingredient measurements.
Use the same ratio for oil: 1 tablespoon per 1/4 cup of kernels, 2 tablespoons per 1/2 cup, and 3 tablespoons per 3/4 cup. Drizzle the oil directly over the kernels in the base and ensure even coverage before heating. Accurate measurement is key; pouring too loosely can result in greasy, uneven popcorn. High-smoke-point oils like canola or coconut are recommended for stable popping, as they withstand high heat without burning.
Always keep your batch within your machine’s listed capacity. Too little oil or kernels can under-coat and affect flavor, while overfilling strains the machine and hampers performance. Precise measurements lead to predictable yields, better texture, and faster popping every time.
Start Your Dash Popcorn Maker Safely
Starting your Dash popcorn maker safely involves several important steps. First, place it on a stable, dry countertop away from flammable items like curtains or towels. Ensure there is adequate ventilation above and around the unit and keep it indoors, away from cluttered areas. Use a properly grounded outlet that is not controlled by a timer, and inspect the power cord for damage before plugging in. Adding a splash guard can help prevent oil and moisture from creating electrical hazards near the appliance.
Only turn on the machine after adding oil and kernels, then position the lid correctly. Press the power button to start heating—this process begins immediately, so treat the appliance as hot from the start. Always use oven mitts to prevent burns and keep children away unless they are supervised.
Stay nearby during the first few minutes of operation to monitor the machine. Do not leave it unattended. If you notice smoke, sparks, or any abnormal burning smell, stop using the popcorn maker immediately. Once the popcorn is ready, you can add flavoring and transfer the batch to storage containers. For now, focus on ensuring everything is set up and used safely from the beginning. For a durable option, consider using a sturdy ice cream cup that can withstand high heat.
When to Stop the Machine for Perfect Popcorn
Knowing when to shut off your Dash popcorn maker is crucial for perfect popcorn. The best time is when the popping slows to about 2 to 3 seconds between pops. This gap indicates most of the kernels have finished popping but some residual heat will still finish the last few without burning. Don’t wait for complete silence; use the sound of the pops as your cue. Continuous popping means it’s not ready yet, but if the pops become intermittent and the pauses extend to 2 or 3 seconds, it’s time to turn off the machine. Immediately drain the popcorn afterward to maintain a crisp texture. For a similar principle, choosing the perfect sticks is essential for quality cotton candy results. Waiting too long risks burning the batch, so rely on the rhythm of slowing pops rather than a timer for perfect results. Similarly, selecting an ice cream freezer with consistent temperature control is essential to prevent freezer burn and preserve quality.
Why Your Popcorn Burns (and How to Prevent It)
Your popcorn keeps burning in the Dash popcorn maker mainly because of kernel overfill. Keep the measured kernel amount within the manufacturer’s recommended fill level. Overloading the chamber causes kernels to come into direct contact with the heat, which leads to scorching. Proper airflow is crucial for even popping, so sticking to the suggested quantity prevents burning.
Another common issue is vent blockage. Ensure that the air intake and exhaust vents are clear of dust, debris, or surrounding clutter. Blocked vents trap heat inside, raising internal temperatures and increasing the risk of burnt popcorn. After popping, turn off and unplug the machine immediately to prevent leftover kernels from burning. Allow the machine to cool for 10 to 12 minutes between batches to avoid overheating. Using fresh, dry kernels and at least half a measuring cup ensures the appliance runs efficiently; too few kernels can cause it to run longer, which may also result in burning. For a more reliable popping experience, consider using a machine with consistent heat distribution like those featured in top ice cream maker reviews, which apply similar principles to prevent scorching. To further enhance your snack, applying top seasonings for perfect popcorn can complement the machine’s even heating. For optimal results, bun warmers can also help maintain snack temperature if you want to serve your popcorn alongside other items.
Fix Unpopped Kernels and Machine Stops
Unpopped kernels and machine stops are often caused by kernel moisture issues and operational glitches. For unpopped kernels, use fresh, sealed containers of standard-sized popcorn kernels—about half a cup at a time to avoid overfilling. If kernels are stale or dry, rehydrate them by sealing with a splash of water overnight. Ensure the popcorn machine is not overfilled, as poor circulation can prevent popping. Turn off the unit as soon as popping slows to prevent burning. Using only regular popcorn kernels designed for air poppers is essential to prevent damage to the machine from microwave varieties. Selecting one of the top air popper models can further improve popping consistency and reduce leftover kernels. If you prefer a different popping method, note that avocado oil is safe for popcorn on the stovetop, but not recommended for air poppers. Using kernels with the correct moisture content is key to avoiding stubborn unpopped kernels in any method.
For the machine stopping mid-batch, start with power troubleshooting: firmly plug the cord into a tested outlet, ensure the switch is fully engaged, and check that the measuring cup is properly seated—this often acts as a safety interlock. If overheating caused a thermal cutoff, let the device cool for at least 15 minutes before restarting. Remove any stuck kernels or debris from the chute to prevent jams. If the machine still shuts down after cooling, contact support for further assistance.
How to Serve and Season Without Getting Burned
Once popping finishes, transfer the popcorn to a large serving bowl immediately. This prevents carryover heat from scorching the kernels and stops trapped steam from making the batch soggy. If the popcorn is extremely hot, let it stand for about a minute before seasoning to reduce the risk of burns. Using a wide bowl helps heat dissipate faster and makes tossing easier. Best Snow Cone Machines would similarly benefit from immediate transfer to prevent texture issues. For those exploring other kitchen gadgets, reviewing Best Syrup Bottles can help you find the perfect dispenser for drizzling butter or oil. Cuisinart machines with a compressor freezing element ensure consistent temperature control for frozen treats, just as proper heat management improves popcorn results.
Apply seasonings only after popping stops, since spices can burn easily on hot surfaces. Sprinkle seasonings gradually from a height to avoid clumping, and toss gently after each addition to distribute flavors evenly. A light mist of oil or warm melted butter can help powders stick without making the popcorn soggy—add it sparingly in the bowl, not during popping. Serve the popcorn soon after seasoning for the best flavor and texture, as both tend to decline over time.
Be cautious of rising steam when handling hot popcorn—avoid fingers coming into contact with it, and use a towel to grip the bowl if needed. Never taste directly from the appliance, where metal parts stay very hot. Proper serving and seasoning techniques keep your popcorn delicious and safe to enjoy.
Clean Your Dash Popcorn Maker the Easy Way
After your Dash popcorn maker has cooled completely and you have unplugged it, remove all washable parts. This includes the bowl, lid, measuring cup, and stirring bar—these are the components easiest to clean. Wash each piece in warm, soapy water using a soft sponge. Rinse thoroughly to remove all soap residue and dry each part completely before reassembling. Some parts are dishwasher-safe; check your manual to confirm which ones can go in the dishwasher.
Next, wipe the base and interior with a damp cloth. Use a soft brush or cloth to gently remove any loose popcorn kernels or debris. Avoid submerging the base or exposing it to excessive moisture, especially near vents and switches. Never use abrasive cleaners or scrub the nonstick surface, as they can cause damage over time. Keep liquids away from vents to prevent internal damage. For reference, making perfect popcorn at home requires heating oil and kernels in a covered pot on the stove, shaking frequently to prevent burning. Using a specialized appliance like a hot dog cooker with bun warmer can similarly simplify snack preparation by keeping buns warm while sausages cook evenly.
Finish by drying every part fully to prevent rust or mold. Inspect the nonstick coating periodically for signs of wear or scratches. Regularly cleaning and maintaining your popcorn maker after each use helps prevent buildup and preserves its performance, ensuring your popcorn stays perfect and your machine lasts for years. Store it in a dry, clean location to keep it in top condition.
3 Temperature Hacks for Fluffy Kernels Every Batch
Starting with three temperature hacks ensures every batch of popcorn turns out fluffy and perfect. First, preheat your popcorn maker or pan to between 380 and 400°F. This high heat quickly transforms kernel moisture into steam, reaching the 135 psi pressure threshold needed for a full pop. Skipping this step leads to uneven popping and more unpopped kernels.
Second, maintain steady, medium heat rather than maximum. Consistent temperature prevents the oil from scorching and keeps kernels from drying out. Around 356°F is ideal because it allows even expansion and results in tender, fluffy popcorn. Avoid turning the heat up too high or fluctuating it wildly, as this can cause burning or unpopped kernels.
Third, listen carefully for the popping to slow down to 2 to 3 seconds between pops. Once this sound pattern occurs, stop heating immediately. Continuing to cook can over-dry the popcorn, ruining its texture. The residual heat will finish the popping process without overdoing it. Following these temperature hacks will keep your popcorn reliably fluffy every time.