How to Make Frozen Yogurt Without Ice Cream Machine: Easy Step-by-Step Recipe
Wondering how to make frozen yogurt at home without an ice cream machine? You can create a creamy, delicious treat using just Greek yogurt and a few simple ingredients.
The trick is in the freezing process and stirring method to get that smooth texture. Keep reading to learn the easy step-by-step recipe that will have you enjoying homemade frozen yogurt in no time.
Why No-Machine Frozen Yogurt Actually Works
Because sugar lowers the freezing point of your yogurt mixture, it prevents it from turning into a solid block in the freezer. This freezing-point depression keeps your mix scoopable and results in a soft, creamy frozen texture without using a machine. To achieve this, stir your mixture every 30 to 60 minutes, breaking up large ice crystals before they affect smoothness. Thinner mixtures freeze faster and produce finer crystals, enhancing creaminess. Incorporate alternative sweeteners like honey or agave, which depress the freezing point more effectively than plain sugar. Whisking your mixture before freezing adds incorporated air, making the final product lighter. Using Greek yogurt or other yogurt solids helps bind water and strengthen the structure, reducing icy crunchiness. Pre-chill your base to speed through the crystal growth phase. Regular agitation and careful freezer management mimic a churning machine, ensuring your no-machine frozen yogurt stays creamy, scoopable, and perfectly textured every time. Choosing a top popcorn pick for your popcorn maker can similarly improve results by avoiding freezer burn through consistent temperature control. For the best results, choose a base similar to top picks for quality that avoid freezer burn by maintaining consistent temperatures and proper storage. Maintaining a steady freezer temperature, much like how quality and value are evaluated in top-rated shaved ice machines, ensures your yogurt’s texture remains uniform without icy pockets.
What You’ll Need for No-Machine Frozen Yogurt
To prepare for no-machine frozen yogurt, start by gathering a few essential ingredients and tools. You’ll need plain yogurt, ideally Greek yogurt for a thicker texture and stronger tang from yogurt fermentation. Use full-fat yogurt to ensure a creamy result. Sweeteners such as honey or maple syrup help balance the tang, while lemon juice adds brightness and sharpness. Adding vanilla extract provides a subtle flavor layer.
For improved texture and scoopability, mix in a splash of whole milk or sweetened condensed milk. Frozen fruit or fruit purées make excellent mix-ins for flavor and visual appeal. A blender or food processor is necessary for blending everything smoothly. Use a shallow, freezer-safe container for even freezing. During freezing, a whisk comes in handy for stirring to prevent ice crystals, and a spatula helps scrape the base into the container cleanly. Set out toppings like crushed cookies or fresh fruit ahead of time for serving later.
Step 1: Mix Your Yogurt Base Until Smooth
To mix your yogurt base until smooth, start by combining plain full-fat Greek yogurt—known for its thick, creamy texture—with your chosen sweetener and flavorings in a mixing bowl. Using plain yogurt helps avoid excess iciness, especially if you prefer a silky consistency. You can stir in vanilla, citrus juice, or fruit purée at this stage for additional flavor. For perfect results, ensure your mixture reaches the proper sugar balance found in slushie machines to prevent large ice crystals from forming. For a party-friendly twist, consider pairing the frozen yogurt with a soft pretzel dipping sauce for a sweet and savory contrast.
Whisk the mixture by hand for 2 to 3 minutes until no streaks or lumps remain, or use a blender for faster results. Be sure to scrape down the sides of the bowl regularly to incorporate all ingredients evenly. Fully dissolve your sweetener—liquid sweeteners mix in more easily, but granulated sugar can work with longer blending time. Aim for a smooth, thick soft-serve batter-like consistency that’s spoonable, avoiding graininess or excessive runniness. Achieving a uniform base helps minimize ice crystal formation during freezing, resulting in a creamier texture.
Step 2: Pour Into a Shallow Dish for Faster Freezing
Pour your smooth yogurt mixture into a shallow, freezer-safe dish like a 9×13-inch pan or baking sheet. Aim for an even layer about one inch thick, as thinner layers freeze faster and more uniformly. This quick freezing prevents the formation of large ice crystals, helping the final product stay creamy and smooth. To make removal easier, line the dish with parchment paper if desired. Spreading the yogurt in a shallow dish also allows you to easily swirl in flavorings or toppings before freezing, ensuring even distribution without sinking. Using this method speeds up the freezing process and results in a better texture with less effort during serving.
Step 3: Freeze in Stages and Stir Every 30 Minutes
After the mixture has chilled, place it in your freezer and check it after 30 minutes. You will see the edges beginning to set while the center remains soft. Use a fork or spatula to scrape the frozen edges back into the middle. Stir vigorously to break up ice crystals, but avoid whipping in too much air, which can make the texture coarse. Repeating this process every 30 minutes mimics churning, helping to improve creaminess and reduce ice formation. For a richer texture, consider incorporating ice cream cake cones as a crunchy topping or mix-in during the final stir.
Repeat this cycle three to four times over the next couple of hours. During each stirring session, experiment with adding flavor variations like fruit purees or chocolate swirls to customize your frozen treat. Keep the container covered after each stir to prevent it from absorbing unwanted freezer odors. For faster freezing, use a shallow dish, but remember that the overall consistency depends on your freezer’s temperature and how evenly it freezes. Continue until the mixture turns evenly frozen and smooth for the best texture.
Step 4: How to Tell When It’s Soft-Serve vs. Scoopable
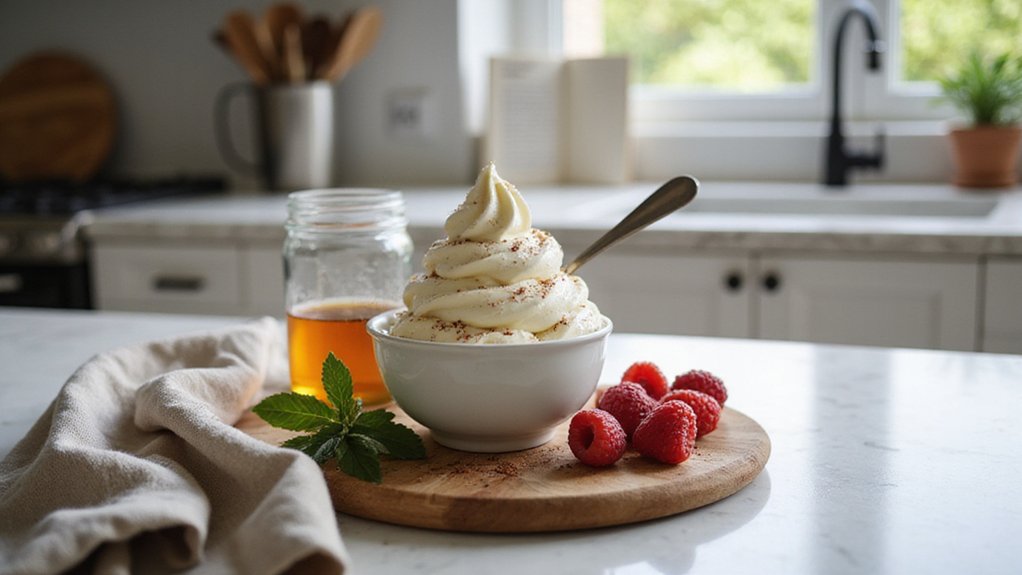
Your frozen yogurt is ready for serving when it reaches a scoopable consistency that holds a clean, rounded shape. A spoon should meet some resistance but still cut through smoothly without forcing. At this stage, the yogurt feels firmer overall and doesn’t collapse immediately when you scoop. If it feels too hard, give it a rest for 5–10 minutes at room temperature to slightly warm it up. This brief wait helps shift the texture from too solid to just right for serving.
Fast Blender Version: No-Machine Yogurt With Frozen Fruit
You can make a creamy frozen yogurt in just a few minutes with a blender and frozen fruit, no ice cream maker needed. Use 2 to 4 cups of frozen fruit—such as berries, mango, or peach—per 1 cup of plain Greek yogurt. Adding a banana helps create a smoother texture and natural sweetness. Start blending on low, then increase to high for about 45 to 60 seconds. Stop occasionally to scrape down the sides of the blender. Taste the mixture, then stir in honey or maple syrup if you prefer it sweeter. You can experiment with endless flavor combinations, like cherry-vanilla or mango-lime. This method also offers nutritional benefits, providing probiotics from the yogurt and vitamins from the fruit, all without extra fillers. Serve immediately for a soft-serve consistency. For the best results, use a high-powered blender with a sturdy basket to achieve a perfectly smooth texture. For a firmer texture similar to crushed ice from a machine, you can freeze the soft-serve mixture for an additional 30 minutes. Storing the frozen yogurt in an airtight container helps preserve its creamy texture and prevent ice crystals from forming.
3 Simple Tricks to Prevent Ice Crystals
Using Greek-style yogurt helps prevent ice crystal formation because its higher protein content binds moisture more effectively. This reduces free water that can form gritty, large crystals during freezing. Unlike popcorn seasonings that rely on butter-flavored salt for a uniform coating, frozen yogurt depends on ingredient chemistry for a smooth texture. To further improve texture, increase dissolved solids by adding about one cup of sugar per 3 to 4 cups of yogurt. Sugar traps water molecules, keeping the mixture creamy and smooth. If you’re lactose intolerant, full-fat, strained yogurt often contains less lactose and still works well for this purpose. For beginners, avoiding common mistakes like failing to chill the base is crucial, as not cooling ingredients beforehand can cause the same issues seen when setting up a candy floss machine too warm. Finally, freeze your mixture quickly in a shallow container. Starting with a fully chilled base at around 40°F ensures smaller crystals form, resulting in a smoother, silkier texture every time you scoop. Using a pancake mix as a base can similarly help stabilize texture by incorporating pre-combined dry ingredients that bind moisture evenly.
Store Leftovers and Serve Without the Sog
Airtight storage is essential for keeping frozen yogurt fresh and preventing ice crystals and odors. Press a sheet of plastic wrap directly onto the surface before sealing the lid to create an effective barrier. Portion leftovers into small containers to minimize repeated thawing and maintain quality. Store them in the coldest spot in your freezer, away from the door, which experiences temperature fluctuations. For best taste, consume leftovers within two weeks; otherwise, the texture will deteriorate. When ready to serve, thaw the yogurt gently overnight in the fridge, then stir to restore smoothness. Serve in chilled bowls and add toppings at the last second. Keep granola, fruit, and sauces separate until serving to avoid sogginess. Only scoop what you need, then reseal immediately. If you prefer a flavor variation, respin machine-made batches before serving. For low-fat yogurt, expect a shorter shelf life—it’s best to eat it sooner. Never refreeze thawed yogurt, as it permanently damages the texture. For those who frequently make frozen yogurt, investing in one of the top popcorn machines can also help create perfect crunchy toppings to pair with your dessert. For consistent quality across batches, a reliable commercial-grade slushie machine can streamline production and maintain ideal texture. Storing your toppings in Top Popcorn Bags helps keep them fresh and crunchy alongside your frozen treats.