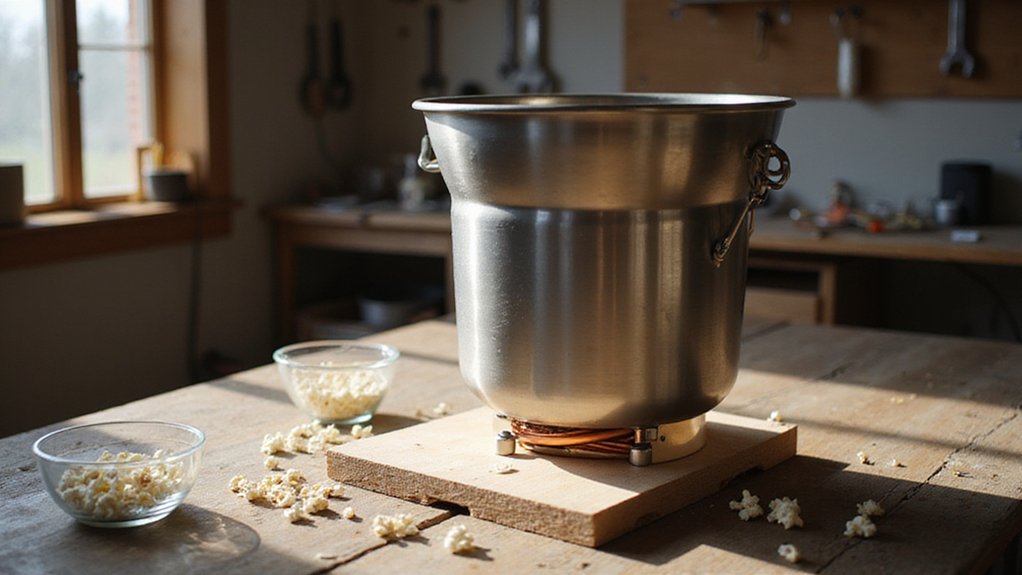
How to Make a Popcorn Machine: DIY Build Guide
If you’re wondering how to build your own popcorn machine, starting with a simple stovetop popper can teach you the basics of heat control and timing.
Once you master that, you can scale up to a full DIY machine using a stainless steel kettle, a small motor, and basic materials for the frame.
Keep reading for all the steps to turn these ideas into a working popcorn maker.
Start With the Simplest Method: Stovetop Can Popper
Start with the simplest method: the stovetop can popper. Heat it over medium-high for about a minute to preheat. Drop in a single test kernel; once it pops, add the oil and remaining kernels, maintaining a 1:1 ratio of oil to kernels. Shake or crank the popper to keep the kernels moving, especially when popping speeds up. Stop popping when the intervals between pops slow to 1–2 seconds, then immediately remove the popper to prevent steam from making the popcorn tough. Unlike a Ninja Slushie machine, which uses a compressor and heating element to freeze and thaw a liquid into slush, this method relies on direct stovetop heat. For flavor variations, toss in spices or melted butter right after popping. Let the popcorn cool completely before sealing it in an airtight container to keep it crisp. For longer-term crispness, store the popcorn in an airtight container inside a cool, dark place to avoid moisture absorption. After cooking, dispose of used oil safely by letting it cool and pouring it into a sealed, non-recyclable container.
Gather the Parts for Your Popcorn Machine
To gather the parts for your popcorn machine, start with the power and control components. Ensure your line wire includes a fuse before the switch for safety, and attach a ground to the metal chassis to prevent electrical shock. Check that your heating element matches your kettle’s voltage—common 120V units typically use a 1000W element to provide sufficient heat without overloading your circuit.
For the heating system, select a reliable heating element rated appropriately for your appliance. Next, gather an agitation system by obtaining a stirring motor, a flexible coupling, and a 10 mm stainless steel rod for the shaft. These parts will ensure the popcorn is evenly stirred during popping.
For the kettle, use food-grade materials such as 304 stainless steel for both the kettle body and paddle blades. This meets food-contact safety rules and resists corrosion over time. Finally, assemble the frame using mild steel angle bars and sheet metal guards to provide a sturdy, durable structure, and gather hinges and fasteners to facilitate assembly and access. For consistent results, always use exact measurements when preparing the mixture for your machine. Careful selection and compatibility checks for each of these parts ensure your popcorn machine functions safely and efficiently.
Turn a Can Into a Popcorn Chamber
A clean aluminum drink can is ideal as a chamber body. Start by thoroughly emptying and rinsing the can to remove any residue or labels, which helps prevent contamination. For metal cutting, use scissors or a utility knife to cut a rectangular side opening near the top half of the can. Leave one edge uncut so the flap can bend outward, acting as a guide for popped kernels into your bowl. Unlike hot dog buns, which average around 120 to 150 calories per bun depending on the brand, this popcorn chamber itself contains no food energy. Angle this flap upward to make sure kernels exit cleanly. Add several small vents on the lower sides to optimize airflow; multiple tiny holes support combustion without letting kernels escape, similar to how shaved ice requires precise ice texture for optimal results. Make sure to avoid dents or rust and flatten the bottom for stability. Smooth all sharp edges with sandpaper or tape to prevent injury. Before using, wash the chamber again to ensure it’s clean. This setup guarantees even heating and safe popcorn popping without sealing the can tightly. You can celebrate the completion of this step with applause sounds to create an engaging and celebratory tone in your video presentation.
Wire the Heater and Power for Your Popcorn Machine
To wire the heater and power for your popcorn machine correctly, start by matching the supply voltage to the unit’s rating label. If it’s a standard 120 V, 60 Hz model or a 230 V export version, ensure the voltage supply matches precisely to prevent damage, shocks, or fire hazards. Use a three-prong plug to ground all exposed metal parts—never rely on adapters, which can bypass safety features.
Follow the wiring diagrams provided in your manual. Connect the neutral wire directly to the heating element, and route the live wire through a fuse and a thermal cut-out. The thermal cutoff is essential; it interrupts power if overheating occurs, protecting both the machine and safety. Always dedicate a separate circuit for your popcorn machine to prevent breaker trips caused by other appliances. For the best results, top popcorn picks often use a dedicated heating element optimized for even popping. Choosing a model with ice cream freezer quality can also help prevent overheating issues.
Keep switches and fuses easily accessible for quick disconnection in an emergency. Avoid using extension cords because they can lead to overheating and pose additional safety risks. Check the terminal colors on your wiring: brown indicates live, blue neutral, and green-yellow earth. Proper color coding helps ensure correct connections and enhances safety during servicing or troubleshooting.
Build the Agitation System: Paddles, Motor, and Shaft
Building the agitation system involves three key components: paddles, a vertical shaft, and a motor. Use 3 mm stainless steel to cut two or four paddles with a propeller-like shape, which promotes better oil circulation and even popcorn popping. Weld the paddles directly onto the shaft for sturdiness, ensuring they do not touch the kettle walls to prevent damage or obstruction. A splash guard can be added above the paddles to prevent oil and kernels from escaping during agitation. Since popcorn kernels are seeds that require even heat distribution to pop, this constant motion is essential for preventing scorching. A properly built system is a key factor in top popcorn quality, as even heat and motion reduce burning. Insert the shaft vertically through a bushing designed to minimize leakage and allow smooth rotation. Select a DC gear motor in the 20–40 W range, with an output speed of 25–35 rpm, to provide low-speed, high-torque agitation. Attach the motor to the shaft with a coupling secured by set screws; this prevents slippage during operation. Alignment is crucial—fix the motor in line with the shaft using a sturdy bracket to avoid binding or misalignment. Use food-safe materials throughout the construction to maintain safety and hygiene. With this setup, your paddles will keep the kernels in constant, even motion, reducing scorching and ensuring consistent popping performance.
Assemble the Frame and Collection Tray
Assemble the frame and collection tray to ensure a stable, secure setup for your popcorn machine. Start by cutting box steel or mild steel angle bars to the required lengths. Weld these into a cuboidal support frame that holds the kettle, chute, and collection tray in position. Make the base wide enough to prevent tipping during operation, especially when the kettle is full and in use. Use bolts and washers to connect the frame components for a robust, adjustable fit that keeps everything properly aligned above the lower chamber, allowing popcorn to fall freely into the collection tray. Choosing the best sugar for the machine can also improve the final product’s texture and consistency. Next, install the collection tray directly beneath the kettle’s discharge opening. Use a detachable stainless steel tray with a slight downward slope so popcorn naturally slides toward the serving edge. Mount the tray on slide-in rails or brackets for easy removal during cleaning. Once the frame is assembled and the base squared, fit the tray, ensuring it remains level under vibration. Tighten all fasteners evenly to avoid misalignment. Finish by smoothing all welded joints and applying an anti-rust primer to protect exposed steel from moisture and corrosion.
Test Your Popcorn Machine: Run Small Batches
Start with a small test batch: 3 kernels and 1 ounce of oil. This allows you to quickly check if your machine heats properly without wasting ingredients. Wait 3 to 4 minutes for the kettle to heat up. If the kernels pop normally within this time, your machine is ready for larger batches. If not, double-check the power connection and heat settings before proceeding. For more efficient catering setups, consider that chafing dishes with fuel offer a reliable heat source for keeping food warm during events.
Upgrade Your Popcorn Machine: Better Heat and Insulation
Upgrading your popcorn machine’s heat and insulation can significantly improve performance, and here’s how to do it effectively. First, replace your original heating element with a ring-shaped or thick-film heater to enhance heat distribution across the kettle’s base. This ensures more even popping and reduces cold spots. Opt for an aluminum kettle because aluminum conducts heat faster and more uniformly, minimizing unpopped kernels caused by uneven heating. For perfect results, use exact measurements of oil and kernels as recommended for consistent popping. Even with optimal heat, if your ice cream won’t freeze, it often points to a compressor or thermostat issue that requires professional repair. To further enhance kernel quality, consider purchasing top organic corn kernels for the best flavor and texture.
Wrap the kettle with high-temperature mineral wool fiberglass for thermal insulation. This material retains heat inside, reducing warm-up time and maintaining a stable temperature during operation. To reflect heat back into the kettle, add a layer of aluminum foil cladding over the insulation, taking care not to block airflow necessary for safety and proper ventilation.
For safety and efficiency, install a thermocouple and a cut-off thermostat, wiring them with silicone-insulated cables. This setup provides a reliable way to monitor and control temperature, preventing overheating. Proper insulation and upgraded heating components will decrease power consumption, shorten warm-up times, and deliver consistently well-popped popcorn every batch.