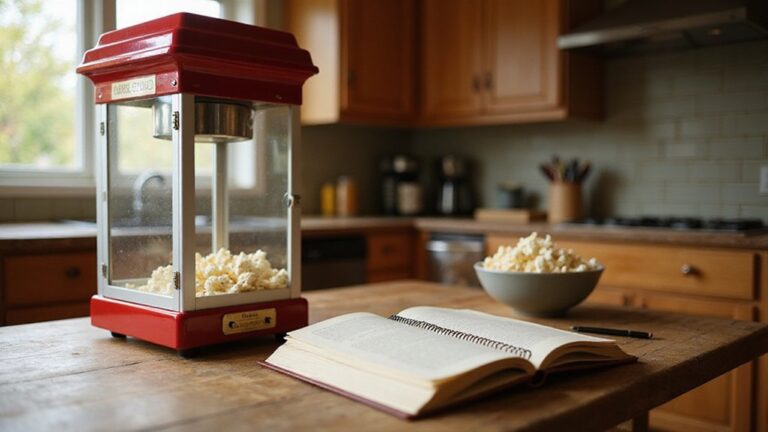
How to Pop Popcorn in a Popcorn Machine: Step-by-Step Method
Ever wonder how to get perfect popcorn straight from your machine? One key is knowing the right steps to ensure even heating and popping without burning or sogginess.
When you follow a simple process—preheating, adding the right amount of oil and kernels, and timing your shut-off—you’ll get fluffy, tasty popcorn every time.
Stay with me to learn the complete method.
Why Preheating Your Kettle Makes Better Popcorn
Preheating your kettle for 3 to 5 minutes is essential to ensure it reaches the optimal popping temperature. This short warm-up allows the kettle to generate enough heat so that when you add kernels, they begin popping immediately and consistently. You’ll see steam rising from the kettle—this signals it’s hot enough. Preheating prevents uneven heating since adding kernels to a cold kettle delays reaching the necessary temperature, leading to unpopped and burnt kernels. Using oil during preheating also helps it sizzle at the right moment, distributing heat evenly and reducing a raw oil flavor. Always follow your manual’s guidelines—never heat an empty kettle if warned against it—to get faster, steadier pops, better yields, and more predictable results. Similarly, choosing a quality ice cream freezer ensures consistent performance and value for your kitchen. Your machine requires exact measurements for oil and kernels to maintain consistent heat distribution and avoid burnt results, just as a slushie machine needs precise ingredient ratios for perfect texture. Properly preheating also reduces the risk of over- or under-cooking the kernels, a common issue that can be avoided with the right temperature control.
How to Measure Oil and Kernels for Your Machine
Measure the oil and kernels accurately to ensure optimal popping. Use a standard ratio of 3 tablespoons of oil per half-cup of kernels as your starting point, but always verify your machine’s kettle size. For a 4-ounce kettle, use about 1/4 cup of oil with 1/2 cup of kernels. An 8-ounce kettle requires roughly 1/3 cup of oil with 1 cup of kernels. For a 12-ounce kettle, measure 1/2 cup of oil along with 1 1/2 cups of kernels.
Always measure by volume using standard cups, as oil consistency affects popping results. Use fresh kernels because kernel quality directly impacts yield and the number of unpopped kernels. Adjust the oil-to-kernel ratio slightly if you notice too many unpopped kernels or overly greasy popcorn. Consistent measurements help achieve even popping and reduce leftover unpopped kernels. Choosing a premium popcorn brand with higher moisture content can further reduce unpopped kernels and improve the final texture.
How to Load Your Popcorn Machine for a Perfect Batch
To load your popcorn machine for a perfect batch, start by ensuring the kettle is preheated for 3 to 5 minutes. This step guarantees consistent popping. Add the oil first and then immediately follow with your measured kernels. Incorporate your flavoring along with the oil so it melts evenly during popping. Close the lid right away to trap heat and create the ideal environment for popping. Always consider the rough cost of materials if you plan to build a DIY machine. When using bulk kernels, always stick to the machine’s fill line, which prevents overloading and ensures even popping. Always begin with an empty, thoroughly cleaned kettle—any leftover remnants from previous batches can affect the taste and quality of your popcorn. Follow the specific loading method recommended for your machine, whether that’s pre-measured packs or a scoop. Once everything is in place, start the pop cycle immediately to achieve a well-popped, fluffy batch. Remember that the final yield per cup of kernels can vary significantly based on kernel size and moisture content, so one cup of kernels typically produces about two quarts of popped popcorn. For a DIY approach, you can build a snow cone machine alternative using a similar heating method.
How to Tell When Your Popcorn Is Done Popping
When your popcorn is done, you’ll notice the popping slows to a pause of about 2 to 3 seconds between bursts. This rhythm indicates most kernels have fully expanded, signaling that it’s time to stop heating. Don’t wait for absolute silence—residual heat may cause the last few kernels to pop shortly after you hear the slowdown.
Listen carefully to both the sound and the aroma. A fresh popcorn smell confirms the batch is ready. If you detect a burnt scent, it means you’ve gone too far and risks overcooking or burning the popcorn. You’ll also see the kettle pushing popped corn toward the lid. The combination of this movement and the slowing pops confirms the expansion process is nearly complete.
Once you hear that 2-to-3-second pause in popping, immediately turn off the heat. Dump the kettle right after popping stops to prevent scorching or drying out your popcorn. This timing is similar to how a compressor freezer ensures consistent results by maintaining the ideal temperature throughout the process. Leaving the machine on longer can burn the oil residue and compromise the texture of your final batch.
The Right Way to Dump and Season Fresh Popcorn
Once the popping slows to a pause of about 1 to 3 seconds between bursts, dump the kettle promptly to prevent scorching. Gently transfer the popcorn into a large, dry bowl—overcrowded containers crush flakes and can ruin seasoning distribution. Move the warm popcorn quickly to help the flavors adhere better.
Next, lightly spray the popcorn with an oil mist, which acts as a binder. Be careful not to use too much, as excess oil can make the popcorn soggy. For even flavor coverage, practice flavor layering: sprinkle salt or spices in small amounts, then toss to coat. Repeat this process a few times, adding seasoning gradually across the batch. This method ensures each piece gets coated evenly, not just the top layer. Finely ground salt distributes more uniformly than coarse crystals. Always season after popping and avoid adding flavors in the kettle unless your manual specifically allows it. Keep the popcorn warm throughout the process to maximize absorption of flavors, and handle it gently to preserve those fluffy shapes.
Your Kernels Won’t Pop? Here’s How to Fix It
Moisture isn’t the only factor affecting popcorn popping. The popping temperature is crucial. Preheat your machine to between 400 and 460 degrees Fahrenheit for several minutes, especially if you’re using a metal kettle. This ensures kernels reach the necessary temperature for popping. Overloading the machine can also hinder performance; stick to the manufacturer’s recommended batch size. Check your kernels’ age—kernels older than 12 months are more likely to stay unpopped. If your popper isn’t heating properly, it might need maintenance or replacement. Just as with cotton candy, using top floss sugar can dramatically improve your final product’s quality. Fixing these issues will help you achieve a full, fluffy bowl each time. Regular cleaning of your machine with a proper sanitizer prevents residue buildup that can affect popping efficiency. For those considering an upgrade, choosing a model with a sturdy cart ensures easy mobility and stable operation during frequent use.
How to Clean Your Popcorn Machine Without Damaging It
Before you start cleaning, turn off all heat, motor, warmer, and light switches, then unplug the machine to reduce the risk of electrical shock. Allow the unit to cool completely, at least 30 minutes, before beginning. Remove all loose kernels and debris from inside the cabinet. To simplify the removal of stubborn grease, boil water inside the machine for three to five minutes to generate vapor before unplugging. Using Flavacol in the kettle creates a consistent salty flavor that minimizes greasy residue.
Detach the kettle carefully, making sure not to damage any parts. Cleaning tip: never submerge the kettle in water. Instead, wipe it down with a damp, non-abrasive cloth. For the glass surfaces and interior, use a damp cloth combined with a food-safe, ammonia-free glass cleaner, avoiding excess moisture near electrical components. Selecting a model with top-rated oil capacity can also reduce splatter and make cleanup easier.
Wash removable trays, lids, and other accessories in hot, soapy water. Dry these parts thoroughly before reassembling to prevent mold and corrosion. Stick to regular maintenance routines and simple cleaning methods to keep buildup at bay. Always avoid harsh chemicals or abrasive scrubbers that could damage surfaces. Only reassemble the popcorn machine once all parts are entirely clean and dry to ensure safe operation.
5 Popcorn Machine Mistakes That Ruin Your Batch
Overloading the kettle is a common mistake that can ruin your popcorn batch. Adding too many kernels causes uneven heat distribution, leading to more unpopped kernels and potential jams. Always match the batch size to your machine’s capacity to ensure proper popping. This helps maintain consistent temperature and airflow, resulting in a fluffier, more evenly popped batch. Using the correct oil-to-kernel ratio prevents scorching and ensures every kernel pops fully. For a lighter snack option, consider that hot dog buns typically contain around 120-150 calories each, which is comparable to a full serving of air-popped popcorn, so portion control matters when pairing either with your meal.
Keep Your Popcorn Machine Running for Years
To keep your popcorn machine running for years, regular maintenance is essential. After each use, unplug the machine and allow it to cool completely before cleaning. Wipe the exterior with a damp cloth to remove dust and residue. Empty the crumb tray and remove any leftover kernels to prevent buildup. For the kettle, wash with warm, soapy water using non-abrasive pads, but avoid immersing electrical parts in water. Regularly deep-clean the kettle to eliminate grease and residue that can affect popping performance. Similar to maintaining optimal performance in other appliances, you may need to follow a reset procedure to clear internal errors. For top results, choose high-quality salt to enhance flavor without damaging the machine. Inspect the power cord and switches for signs of wear or damage and address issues promptly. Always store the machine only after all parts are thoroughly dry and covered. Performing light cleaning after every use and a thorough clean weekly helps ensure consistent performance. Using manufacturer-recommended cleaning products can help keep vents clear and prevent premature wear, ensuring your machine stays in top shape for years to come. In addition, selecting a sugar cone style for your kettle’s oil can mimic professional taste without adding damaging residue.