How to Use a Chafing Dish: Easy Operating Guide
Ever wonder how to keep hot food safe and appetizing at a gathering? Using a chafing dish properly ensures your dishes stay warm without drying out or losing flavor. The key lies in managing heat and fuel carefully, so your food stays above 135°F for the duration.
Here’s a simple breakdown to help you operate a chafing dish smoothly and confidently.
What Is a Chafing Dish?
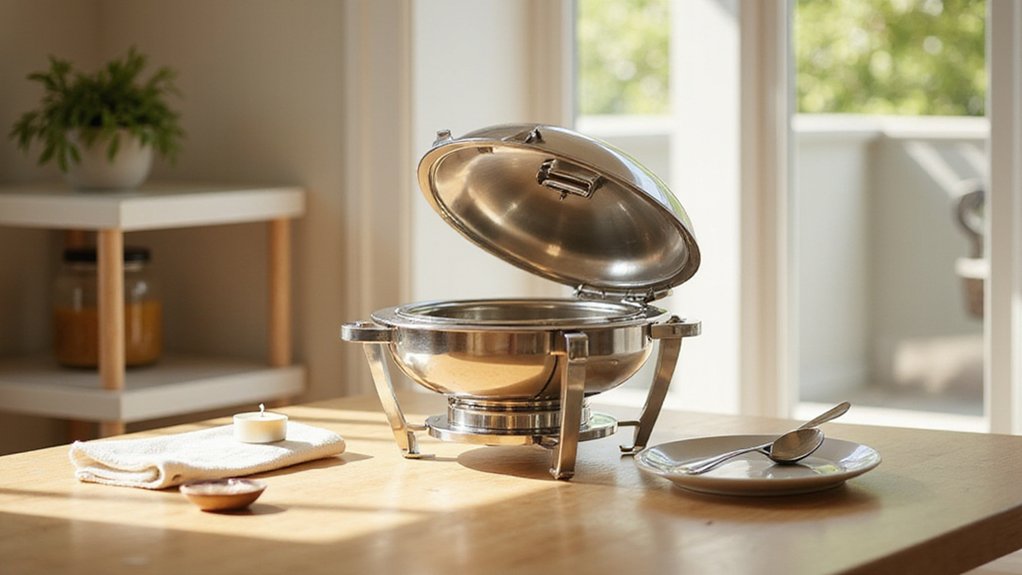
A chafing dish is a serving vessel designed to keep food warm during events like buffets, banquets, or catered parties. It works by using indirect heat to prevent the food from cooling or drying out. The typical setup includes a water pan placed beneath the food pan; the water is heated to produce gentle steam that maintains the food’s temperature without cooking it further.
Modern chafing dishes are mostly made from stainless steel, which offers durability and a clean look. Copper and silver-plated models are also available, often chosen for their decorative appeal in formal settings. The heating element usually involves igniting a fuel canister or using electric heat sources beneath the water pan. Properly adjusting the heat source requires a proper setup similar to adjusting the controls on a popcorn machine to avoid scorching or uneven heating. For those seeking consistent results, selecting a model with stainless steel construction can improve heat distribution and longevity. Event hosts should follow fire safety guidelines for chafing fuel cans to prevent accidents during service.
It’s important to note that a chafing dish is not an oven or a reheating device. Its purpose is to preserve the serving temperature of already cooked foods, ensuring they stay safe and appealing for the duration of the event. Proper use involves monitoring the heat to avoid overheating or drying out the food.
Where to Place and Assemble Your Chafing Dish
Place your chafing dish on a level, heat-resistant surface that can support its full weight without wobbling. Ensure the table or countertop is sturdy, with locked legs if applicable, to prevent shifting during use. Position the unit away from high-traffic areas, doors, and flammable objects like paper or plastic to minimize safety risks.
Keep a clear space around the dish for air circulation and easy serving access. Avoid placing it in direct sunlight or near open flames, as both can affect the food’s temperature and safety. When assembling, start by building the frame and confirming its stability before adding any components. Insert the water pan first, followed by the food pan on top, then securely place the fuel holders, keeping fuel cans closed until use. Check that the lid and pans fit snugly to contain heat properly, and always recheck stability before serving. For a different cooking application, remember that avocado oil offers a high smoke point suitable for high-heat tasks like popping popcorn. Unlike a chafing dish, a Ninja Slushie machine uses a freezing process to create frozen beverages. Some manufacturers also offer specialty popcorn boxes that ensure kernels stay warm and crispy during events.
Fill the Water Pan and Preheat the Unit
Fill the water pan with hot or simmering water—never cold water—to ensure a quick and efficient warm-up. Start with about one inch of water, making sure it stays below the food pan to prevent overfilling. Overfilling can cause splashing or contact with the food, which is unsafe and can interfere with proper heating. In fact, splash guards can help prevent such splashing issues in similar setups. It typically takes 10 to 15 minutes for steam to start rising and indicate that the unit is preheated. For fuel-based units, this process may extend up to 30 minutes. Keep the lid on during preheating to trap heat and accelerate steam buildup. As with a heat lamp setup, beginners should avoid placing the pan too close to the heat source or leaving it unattended until steam is steady. For best results, consider using high-quality cotton candy bags for serving any accompanying fluffy treats. Regularly check the water level during service, adding hot water as needed to prevent the pan from boiling dry. Adjust the heat source to maintain a steady stream of steam without overheating. Once visible steam is present, the unit is ready, and your food should be hot and at or above 140°F.
Choose the Right Chafing Dish Fuel (Cans, Gel, or Electric)
Fuel canisters are your best option for portable, off-grid events. They typically burn for 2 to 8 hours, depending on size and usage. This makes them ideal when you need mobility and flexibility without access to electric power or strict venue restrictions. Gas canisters are easy to set up and replace, offering quick, consistent heat. Just ensure you store and handle them safely, away from heat sources and in well-ventilated areas to prevent leaks or accidents.
Gel fuel heats quickly and is suitable for shorter service periods. It burns cleaner and produces less smoke and odor compared to canisters, which can be an advantage indoors. However, gel containers should be stored carefully to prevent spills and ensure safe handling. They are generally straightforward to use—just light and go—making them a good choice for temporary setups requiring rapid setup and takedown.
Electric chafing dishes provide a safe, fuss-free alternative, especially where open flames or combustible fuels are restricted. They offer consistent, adjustable heat without the need for fuel replacement, making them suitable for indoor venues with fire regulations. They also reduce the risk of accidents related to flames or spills. Always verify that your venue allows electric appliances and check the electrical requirements beforehand to ensure reliable operation. For those comparing portability and heat consistency, the best ice cream freezers offer similar considerations for quality and value in temperature control.
Light Your Chafing Dish Safely
Ensure the chafing dish is on a stable, non-combustible surface and that the fuel can is fully seated in its recess before lighting. Never attempt to light a can that is being carried or adjusted, as this increases the risk of spills or accidental ignition. Use long-reach safety tools like a butane lighter or a long match to keep your hands and face away from the flame. When igniting, do not lean directly over the opening, and avoid using another lit can or rolled paper as the flame source—these methods can lead to fires. Maintain a trained staff presence, keep overhanging tablecloths clear, and have an ABC fire extinguisher nearby for safety. After lighting, do not touch the hot gel can, and focus on maintaining safe conditions rather than adjusting temperature until you’re ready to do so. For consistent results, pre-chill the chafing dish fuel can and liquid ingredients to the same target slushie temperature used in a slushie machine.
Adjust Temperature Targets Before Adding Food
Before adding food to the chafer, set your temperature target at 135°F (57°C) or higher to ensure food safety. Keep in mind that 140°F (60°C) is a common buffet standard for hot holding. Remember, a chafing dish’s role is to maintain heat, not to cook or reheat food. To ensure the unit is ready, preheat it with boiling water for 15–30 minutes, keeping the lid on to retain warmth. Your food should enter the chafer already at serving temperature, not at room temperature. Always verify this with a thermometer, especially for thick foods which require extra care. This preloading step ensures your food stays out of the temperature danger zone, keeping your setup safe and stable from the start.
Add Food to the Dish and Serve
Once your food is at the proper serving temperature, adding it to the dish requires care to maintain quality and safety. Use a clean, fully hot food pan to transfer your prepared dishes directly into the chafing dish. Place the pan securely into the water pan, ensuring it sits level. Add the food as close to service time as possible to keep it fresh and hot. Immediately close the lid to trap heat and steam, which helps maintain food temperature and moisture. Following each use, a routine similar to cleaning your popcorn machine can help prevent buildup and extend the unit’s longevity. Understanding how the first automatic popcorn machine revolutionized concession stands can inform best practices for high-volume events.
For optimal flavor and presentation, keep each pan dedicated to a single dish; avoid mixing different foods or old and new batches in the same pan. Use matching serving utensils—such as ladles for soups or tongs for meats—to serve each dish cleanly and attractively. Never serve food with your hands to prevent contamination. If a pan is nearly empty, replace it with a fresh batch instead of layering new food on top of leftovers. After service, discard any remaining leftovers rather than storing them in the dish to ensure food safety. Before you begin, ensure the water pan is filled to the proper level, as this prevents overheating and keeps the heat distribution even, similar to checking initial settings on a new appliance.
Monitor Water and Fuel During Service
To keep a chafing dish running safely and efficiently throughout a long buffet, you must regularly monitor both the water level and the fuel. Check the water pan every 60 to 90 minutes and refill it with hot water to maintain consistent heat. Never let the water run dry, as this can cause scorching or warping of the dish. To test the water level, lift the empty food pan; the underside should be completely dry, indicating enough water is present. For fuel safety, avoid refilling a burning or hot source. Instead, let it cool completely before adding more fuel. Wipe up any spills immediately to prevent accidents or fire hazards. Replace the fuel before it is fully exhausted to keep the heat steady and avoid sudden temperature drops. Always keep the lid on when not actively serving to reduce evaporation and heat loss. Watch for signs such as diminished steam or weaker heat, which indicate it is time to check or replenish. Treat both water and fuel management as ongoing tasks during the entire service period to ensure safety and consistent food quality.
Extinguish, Cool, and Clean the Dish
To extinguish the flame safely, smother it by placing the fuel can’s lid, snuffer, or damper directly over the heat source to cut off oxygen—never blow on it or use water, which can cause splattering and injury. Always follow fire safety steps: allow the fuel to burn out if it is designed for a full burn time, or turn off electric units and disconnect the power. Let the dish cool completely on its stand before disassembling. Once cooled, empty water pans and discard fuel canisters properly.
Use cleaning techniques that protect your equipment—wash pans, lids, and frames with warm, soapy water and a soft cloth. Soak stubborn residue, rinse thoroughly, and dry immediately to prevent water spots. Never use steel wool or harsh cleaners, as these can scratch or damage surfaces. Finally, store the chafing dish in a clean, dry place after all parts are fully dry.